In the first part of a series on annealing – we will cover off exactly what annealing is and what it does, in the second, we will cover off a couple of specific methods to anneal and finally, my current methodology.
Understanding Brass Annealing – all brass is.
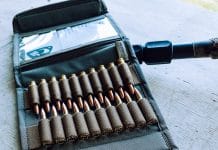
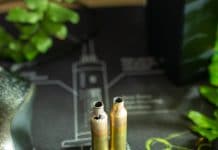
Occasionally you will see some ammo that has a distinctive discolouration around the neck and shoulder of the case. Essentially, it looks like the end of the brass has been burned or ‘charred’. The process that causes this is Brass Annealing.
The reality is, all new factory brass has had this treatment done to it, but some manufactures will polish their cases after the process to ensure their brass looks shiny and new. This seems to be a marketing decision.
For my .308, I decided to grab some new Lapua brass and straight out of the box, you could see the discolouration on the neck. So, what is annealing, what is the effect it has on brass and is it something worth considering adding to your reloading process?
Work Hardening
Brass, like most metals, will become ‘work hardened’ with repeated use – that is, as you repeatedly stretch and then resize brass (firing, reloading), over time it becomes harder and more resistant to being worked. At the extreme end of things, this means the potential to split instead of expand in the chamber and on the more common end, it means inconsistency when reloading in regards to neck tension.
Much like a thin piece of steel – if you bend it back and forth enough times, the metal will eventually snap. Not ideal when we are talking about a controlled explosion happening very close to your face. Brass Annealing is the process of ‘rejuvenating’ the brass which has the result of prolonging brass life and increasing consistency. It’s basically (and literally) stress relief for your brass.
Brass Annealing Theory
Annealing is often confused with Tempering. Both can be considered forms of Heat Treatment, but, with the risk of oversimplify matters – Tempering takes the metal to a lower temperature and tends to harden metals, Annealing is a shorter, hotter process and softens them.1
We don’t want to harden the metal any more than it already is. So, we are talking high temperatures for brief periods of time. Under-anneal, and no real benefit will occur, over-anneal, and you risk over softening your brass. Something you don’t really want when it’s meant to be directing and controlling and explosion.
Brass Annealing Temperature
Online, the suggested temperature your brass needs to get varies a bit, ranging from 600 to 800 degrees Fahrenheit (that’s 315 to 420 Celsius for us in metric land). The average recommendation seems to sit in the 700 F range though (370 C).
How do I tell if it is hot enough?
Colour Change seems to be one of the most common methods of identifying the point where you go from the correct amount of annealing to over annealing. Colour changes occur at two points when annealing brass – both really indicating you are over annealing your brass. The first, the flame coming off the top of the brass will change colour to an orange – essentially, this means you are burning off material from the metal alloy, this might be zinc, it might be tin, depending on the exact composition of the brass. This changes from manufacturer to manufacturer and in fact, from brass run to brass run. The second colour change is the brass itself. If your brass is glowing, you have over annealed your brass. Simple. Throw it away, you have potentially made it dangerous to shoot.
Another method to use is a chemical indicator in the form of heat sensitive paint – Tempilag seems to be the most common brand used. This paint melts at specific temperatures depending on which version/level you have. It’s a great indicator – but again, it needs to be remembered, that different brass is going to have a different optimal temperature. Therefore, observing the specific brass as it’s annealed seems the best method to get the perfect level of annealing.
Brass Annealing Results
Longevity
Peoples primary reason to anneal seems to be to increase the longevity of their brass. More reloads and fires before the brass becomes to hard to resize easily and starts forming stress fractures and cracks. These are very, very bad. So, the more you can revitalise and stress relieve the brass, the longer it will last.
It is suggested, provided you don’t over anneal the brass, you can’t anneal it too many times – it’s simply restoring the attributes you want in your brass. Depending on your methodology, i.e. how much of a pain it is, you may want to consider every three to four fires – many people with the more automated set-ups simply include it as part of brass prep every time they fire.
Consistency
This is more my interest in the brass annealing process – consistency means repeatability, what you ultimately want in precision shooting; the bullet going the same place, time and time again. But having the brass ‘reset’ to a uniform hardness it means the neck tension is the same each time you shoot, reducing yet another variable.
Provided I can set up a system that makes it easy to anneal the brass, then this is something I plan on doing every time I reload my competition brass.
What to be aware of
A couple of points to be aware of when it comes to Brass Annealing.
Only anneal the neck and shoulder
When annealing, we only want to be heating the neck and shoulder. These are the two areas we want to be a touch more pliable – not the whole case. This is why you often see videos and articles with guys taking to their brass with a blowtorch while the case sits in a bath of water. The idea being the water keeps the bottom three quarters of the brass away from the heat and away from the annealing process. A certain amount of the heat will transfer down the body regardless, but we do want to minimise this. If the body itself gets too soft, then we start looking as failures like head and case separation, which is never a nice thing.2
Further Resources
Just go watch this video – it’s a great practical example of annealing and what to look for – https://www.youtube.com/watch?v=fiIrLvAUh6o
That’s an incredibly simplified version – read more here – http://www.brighthubengineering.com/manufacturing-technology/74097-heat-treatment-annealing-and-tempering/ ↩


