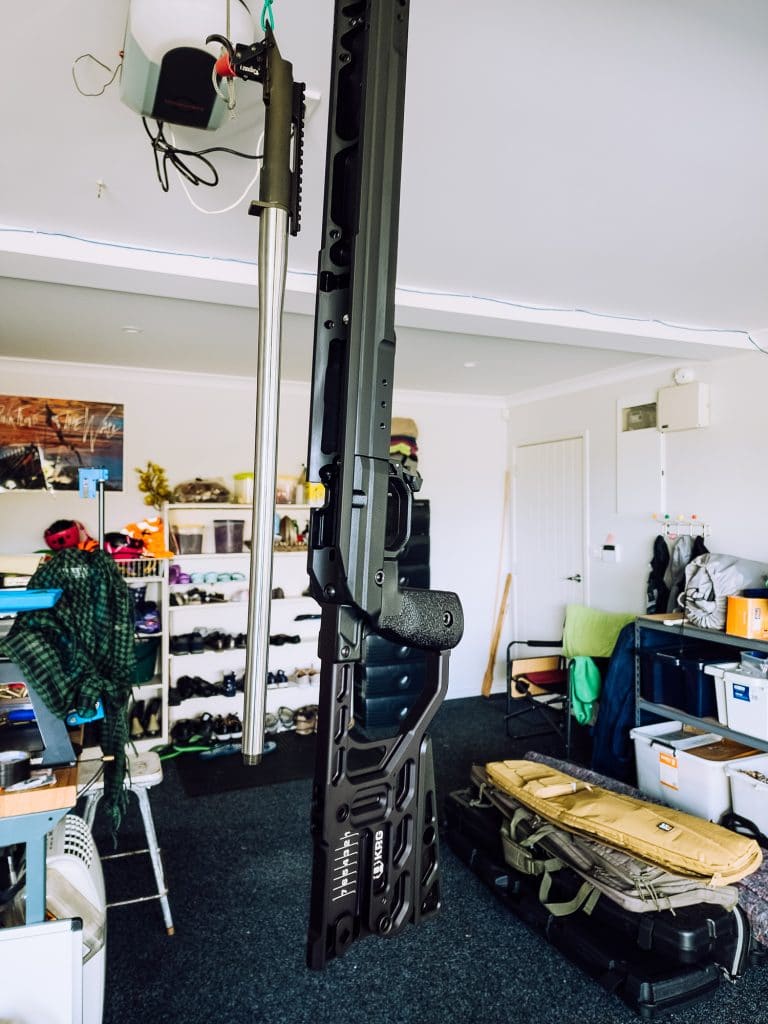
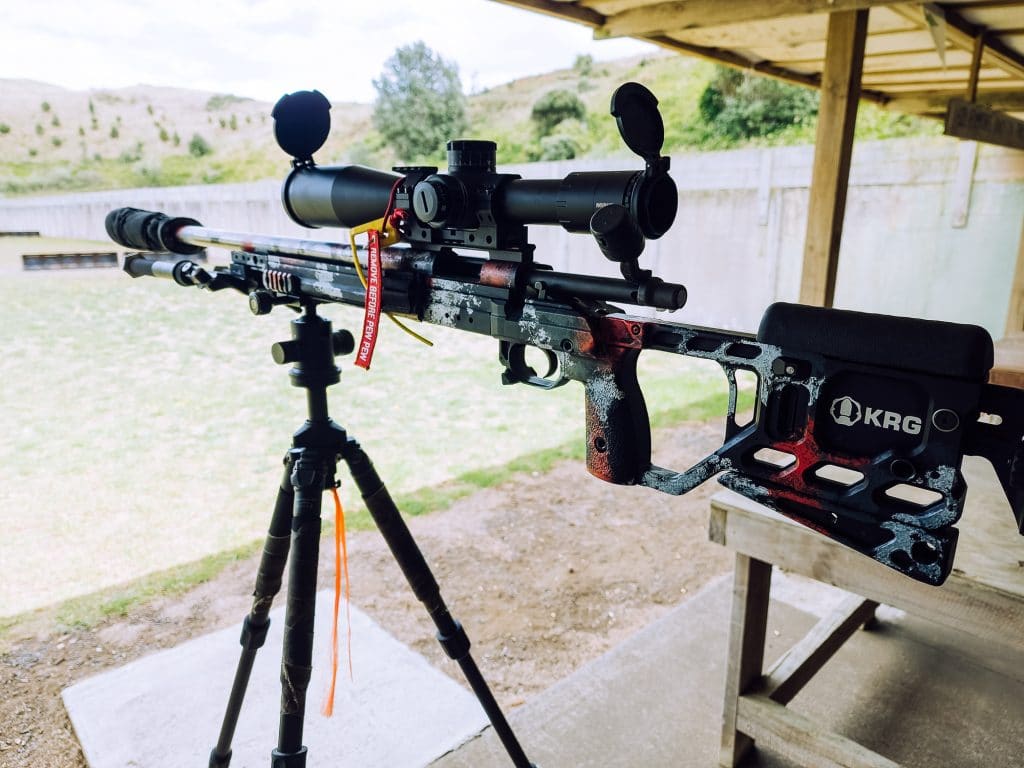
Black guns are boring. I knew, even before getting it, that I wanted to give the KRG Whiskey-3 chassis a paint job at some point. After watching a phenomenal video from Caylen @ Modern Day Sniper many moons ago, I had the methodology in mind, and started putting together the components I needed to do the job.

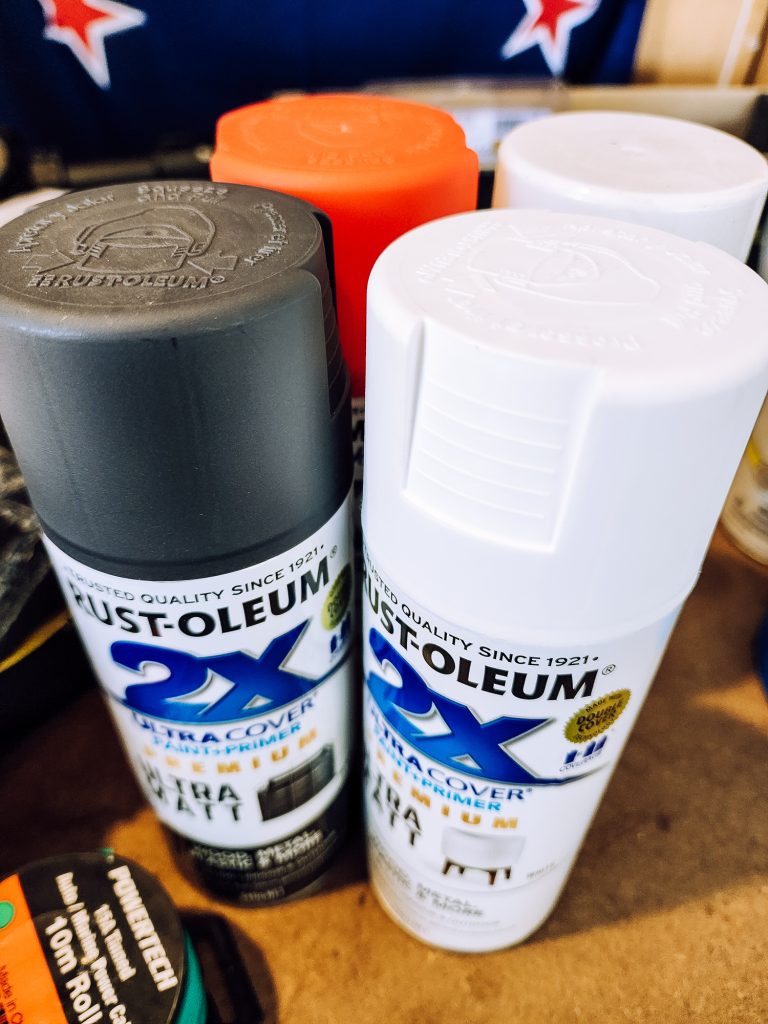
The paint was easy enough. You essentially need matt or satin (or gloss, up to you) paint that is suitable for metal and plastic. The Rust-Oleum was freely available from the local Bunnings, so I grabbed a couple of cans.
I have long had a wallpaper on my computer desktop from Altus Shooting Supplies which features a bit of red in it – this is my competition rifle – so it didn’t need to be in ‘full camo’ – I wanted something a little different.
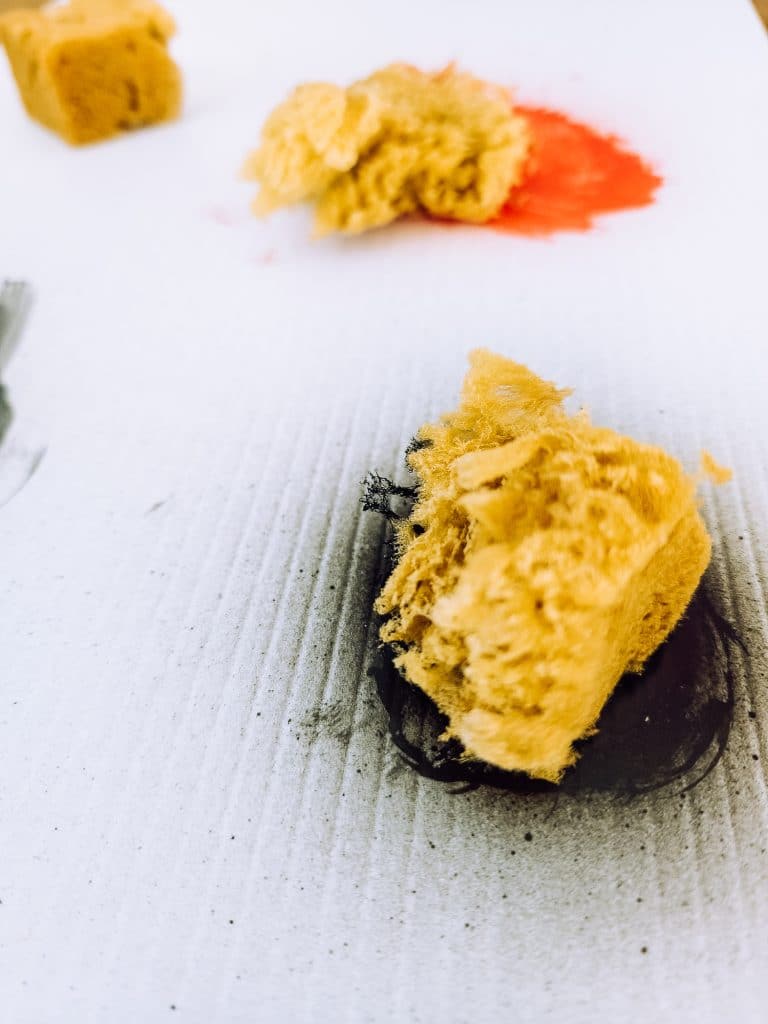
As per the above video – I wanted to use the sponge method – do you think I could find any though! For a couple of months I have been checking out hardware and craft stores – and in the end, ordered them online and waited for them to come in. Apparently, talking to a few people, the raw sponge has been a little hard to come by recently. Blame COVID!
Prep Work
After pulling the scope off the rifle, I took the action out of the chassis and removed anything I didn’t want painted from the rifle – in my case – this was basically the buttstock and cheek riser pads. I gave the whole rig a clean down with some carb cleaner (any degreaser would work). As I skipped the base spray, I didn’t need to mask anything off. I was going to hand apply all the paint, so just avoided anywhere I didn’t want it to go.
I liked the idea of some of the paint over the steel barrel – rather than laying down a coat of black first. Again – up to you.
Painting
I grabbed some card to work as a bit of a pallet (actually target board) and sprayed the paint onto the board, before loading up the sponges and setting to work.
I would suggest starting with the lightest colour first, then working through to the darkest. You can always (as I did) add more paint on top of the lower coasts – so start sparingly, paint a bit, step back, observe, paint a bit more and so on. I think this really is a case of less is more – though it totally depends on the look you are after.
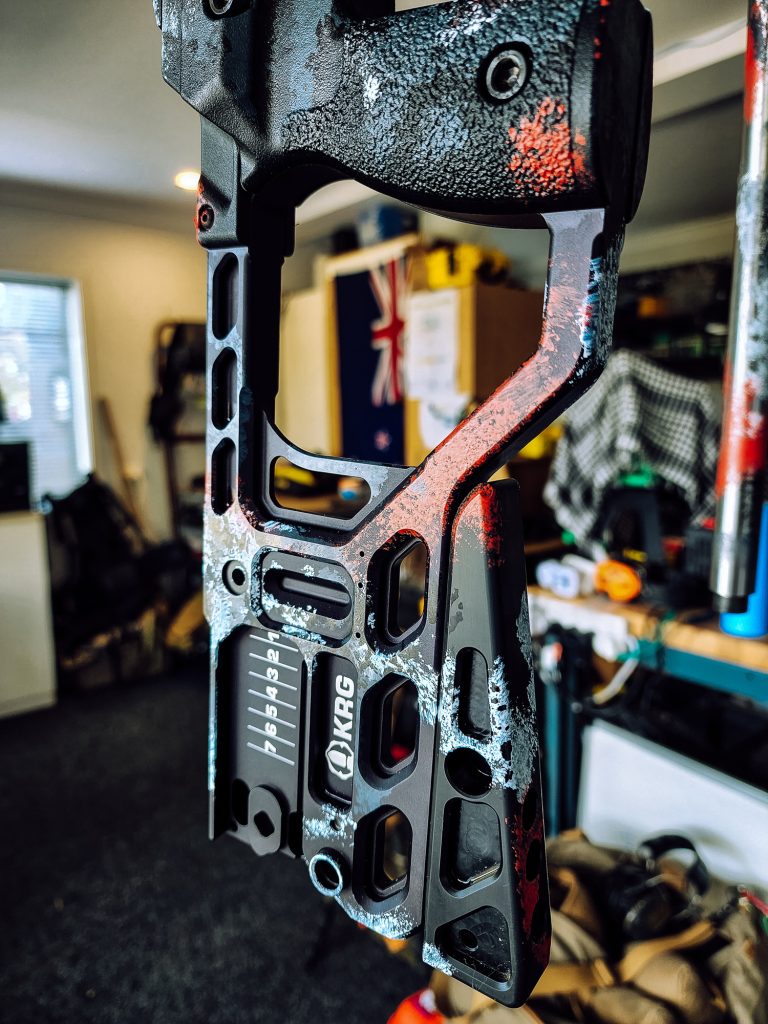
In the video Caylens finishes off the job with a matt overcoat. To be blunt, I also like the worn look – so don’t mind if the paint gets a rough time.
Results!
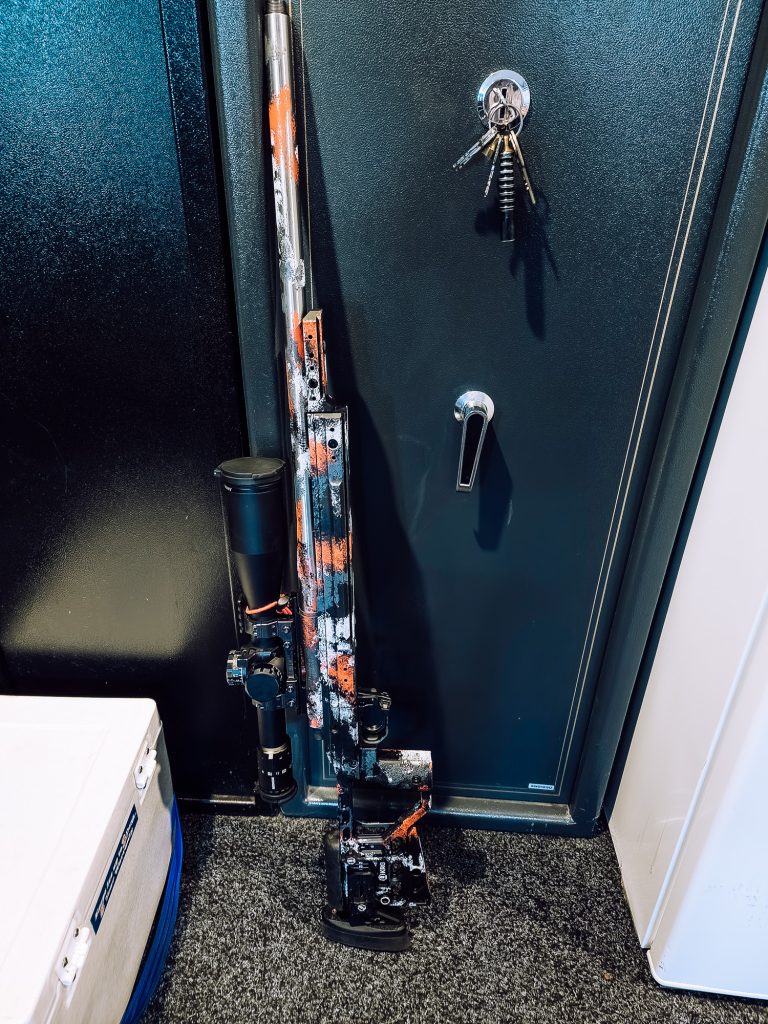
I am certainly happy with the results. The gun still smells a little of the paint solvents – but I am sure that will dissipate fairly quickly – and it’s not really a concern for a comp gun anyhow. The paint also feels a little tacky on the grip – so will be interesting to see if that disappears as it cures over a couple of days.
Regardless, the gun turned out how I hoped it would, so it was simply a case of reassembly everything and taking out to shoot.
I am sad to say the paint job didn’t improve the tripod shooting! 😉

