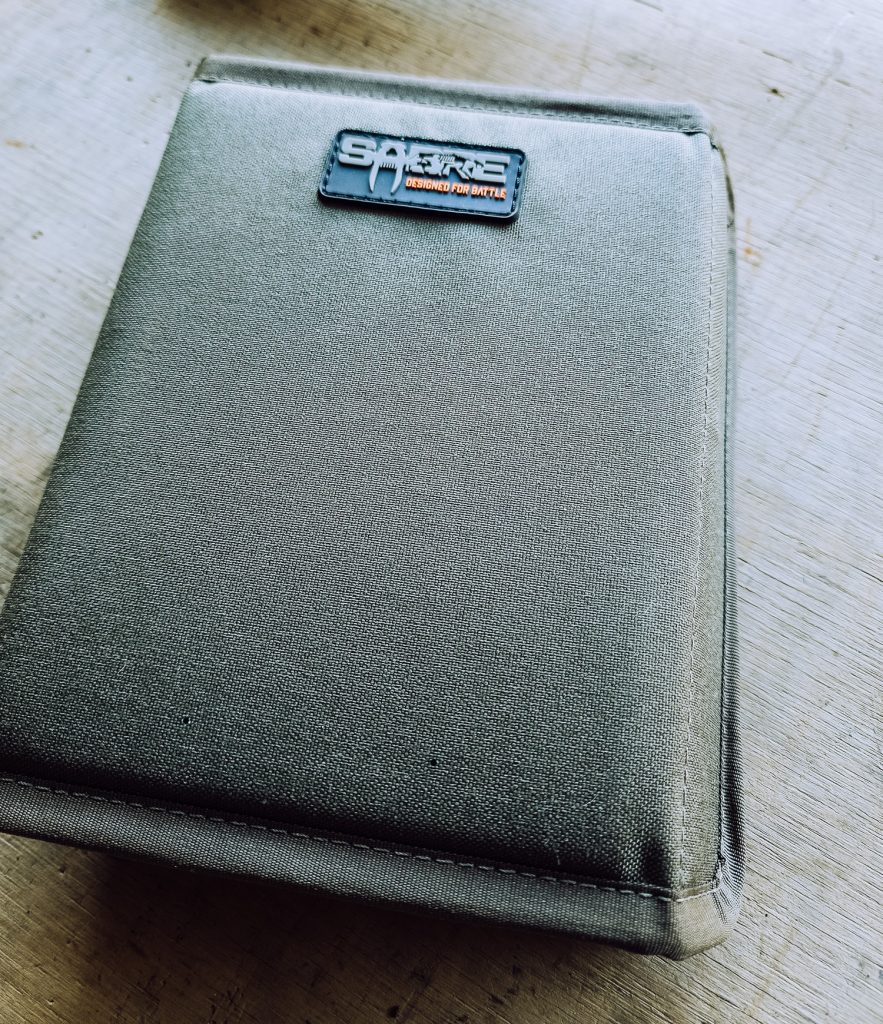
I have gone through all manner of ammo carry methods – MTM Boxes, TACPac Cases, differing wallets of folders – so when one of the Sabre Tactical Ammo Wallets turned up with a clients rifle – I was keen to check it out.
I have met Carl (the owner) a couple of times at shooting competitions now, and he has become an active part of the community (probably more than me at this point!) – with a background in military shooter work (combat shooting team and sniper instructor) he is obviously well qualified to be putting out shooter equipment.
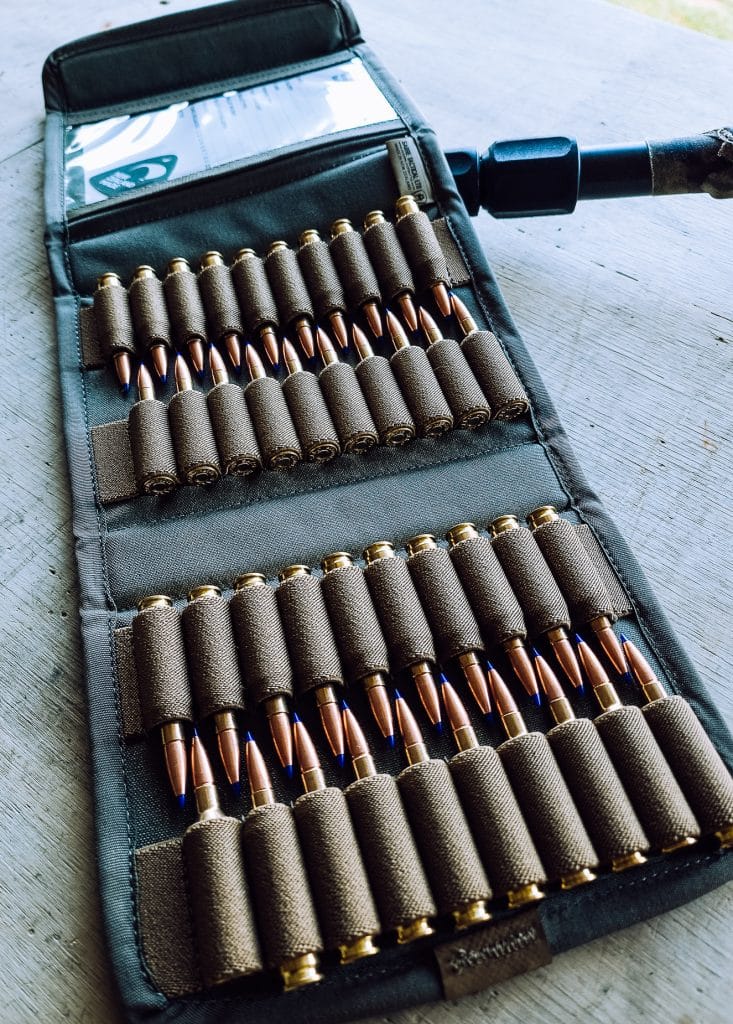
The ammo wallet is a solidly built, well thought out method for carrying either 40 rounds of short action ammo or 20 rounds of long action ammo (depending on the wallet you get). The one that turned up had 6.5 Creedmoor in it – but it’s clear it’s going to fit the vast majority of cartridges.
It is what I would call semi-rigid – it’s going to hold its shape well, but still soft-touch enough that it’s not going to clank around in your bag. Realistically, for a competition – you are going to be carrying two, if not potentially three of these in a pack – so it could get a little bulky – but being most of us are carrying around a backpack, not too much of an issue.
A simple magnetic clasp holds the folder shut when closed, which, in my brief play with the wallet, worked well.
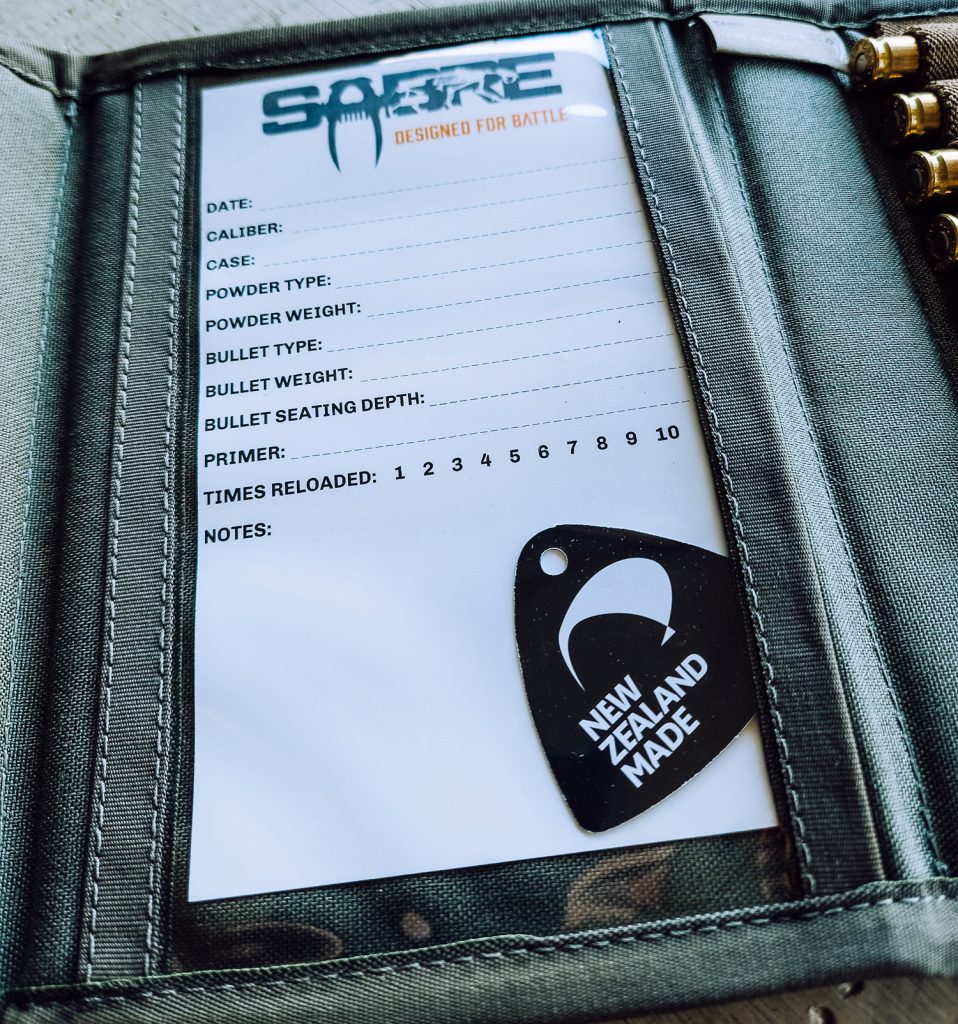
The one thing I personally would change, is the insert – to me, having my reloading information in the field is fairly pointless – when I am on the line, the charge weight or the amount of times I have reloaded the brass is useless to me.
So. Here is my version! Print it out, trim to lines and I personally would then laminate it to serve double duty as an insert of general data/reference card.
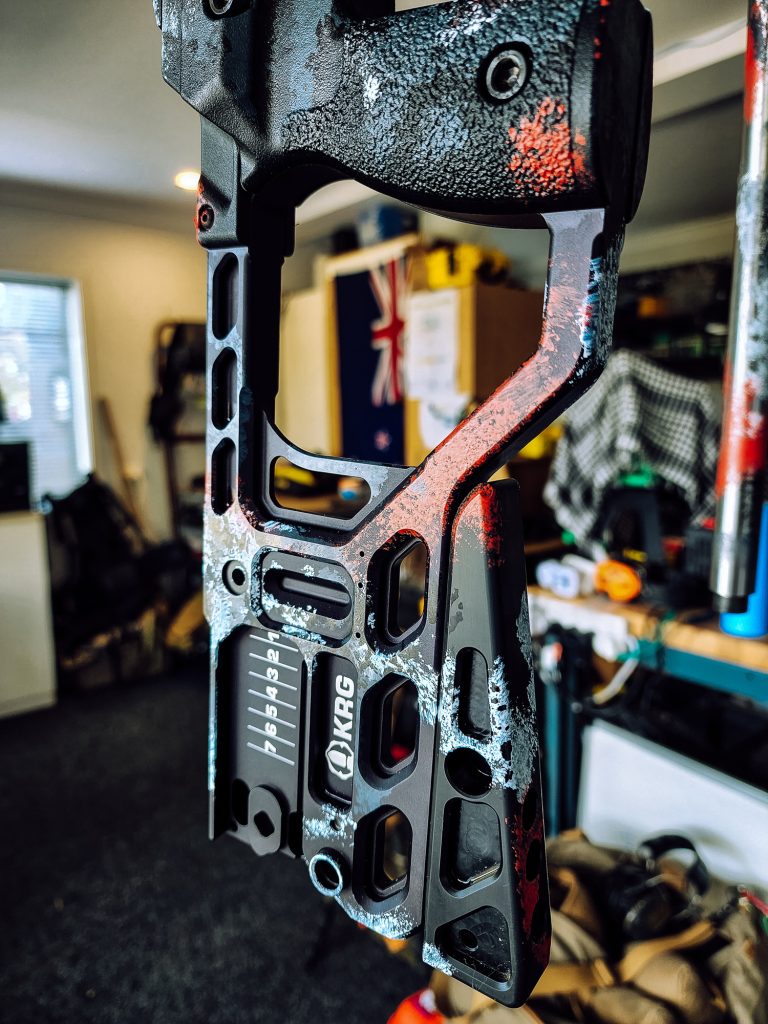
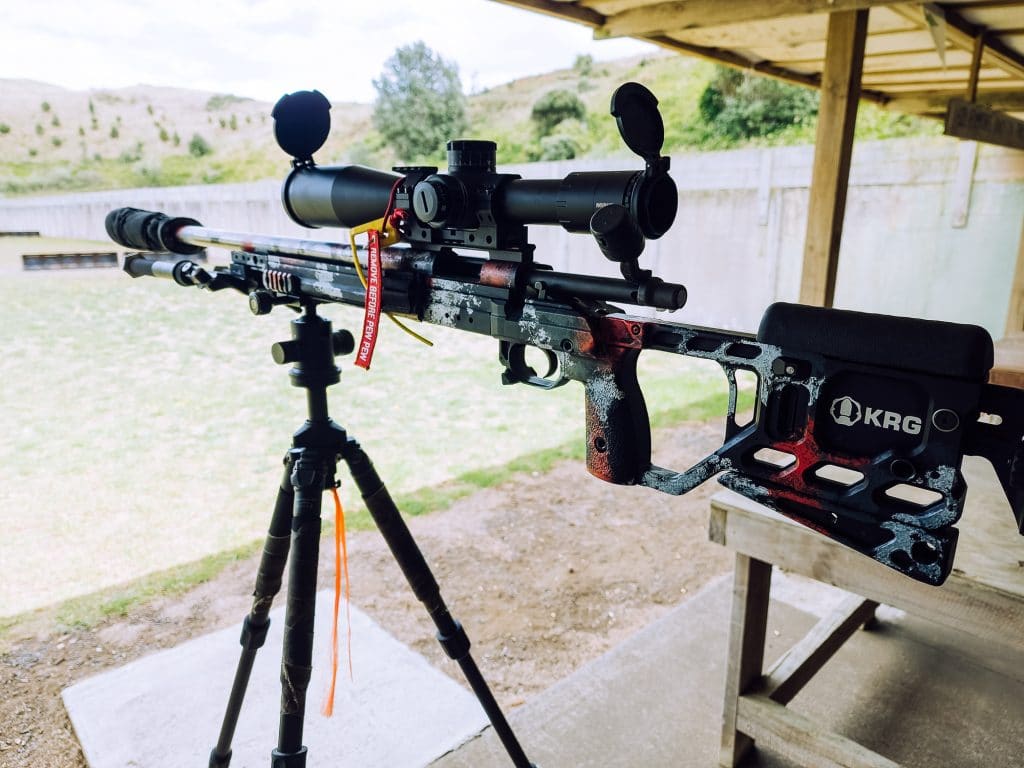
Black guns are boring. I knew, even before getting it, that I wanted to give the KRG Whiskey-3 chassis a paint job at some point. After watching a phenomenal video from Caylen @ Modern Day Sniper many moons ago, I had the methodology in mind, and started putting together the components I needed to do the job.
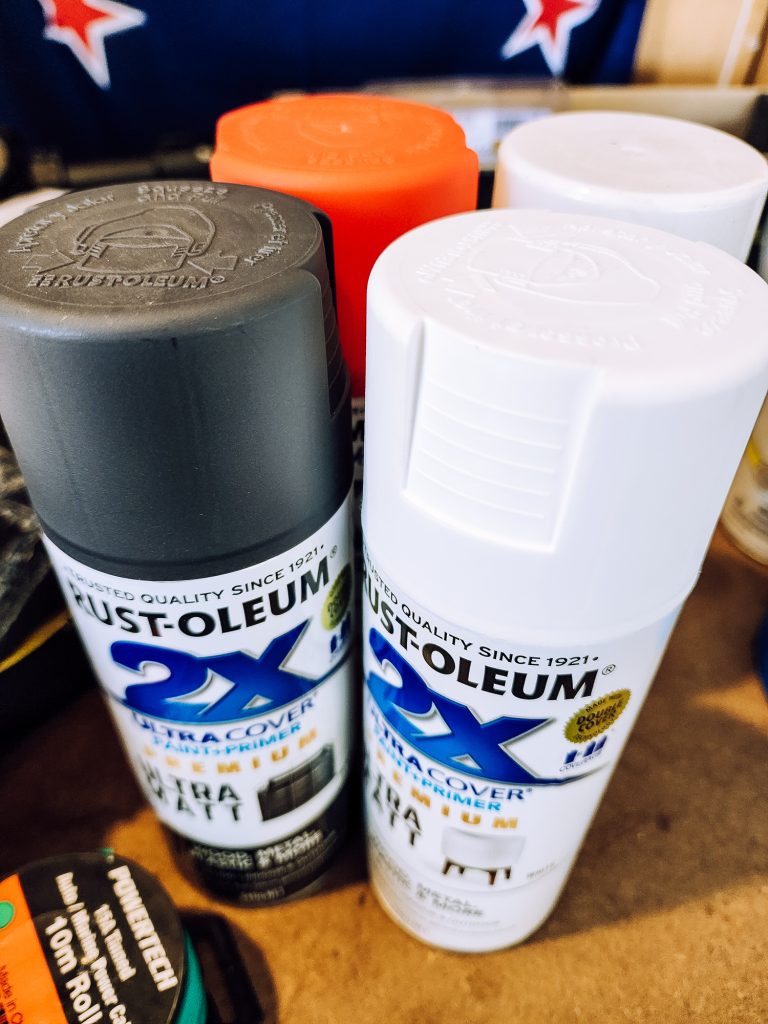
The paint was easy enough. You essentially need matt or satin (or gloss, up to you) paint that is suitable for metal and plastic. The Rust-Oleum was freely available from the local Bunnings, so I grabbed a couple of cans.
I have long had a wallpaper on my computer desktop from Altus Shooting Supplies which features a bit of red in it – this is my competition rifle – so it didn’t need to be in ‘full camo’ – I wanted something a little different.
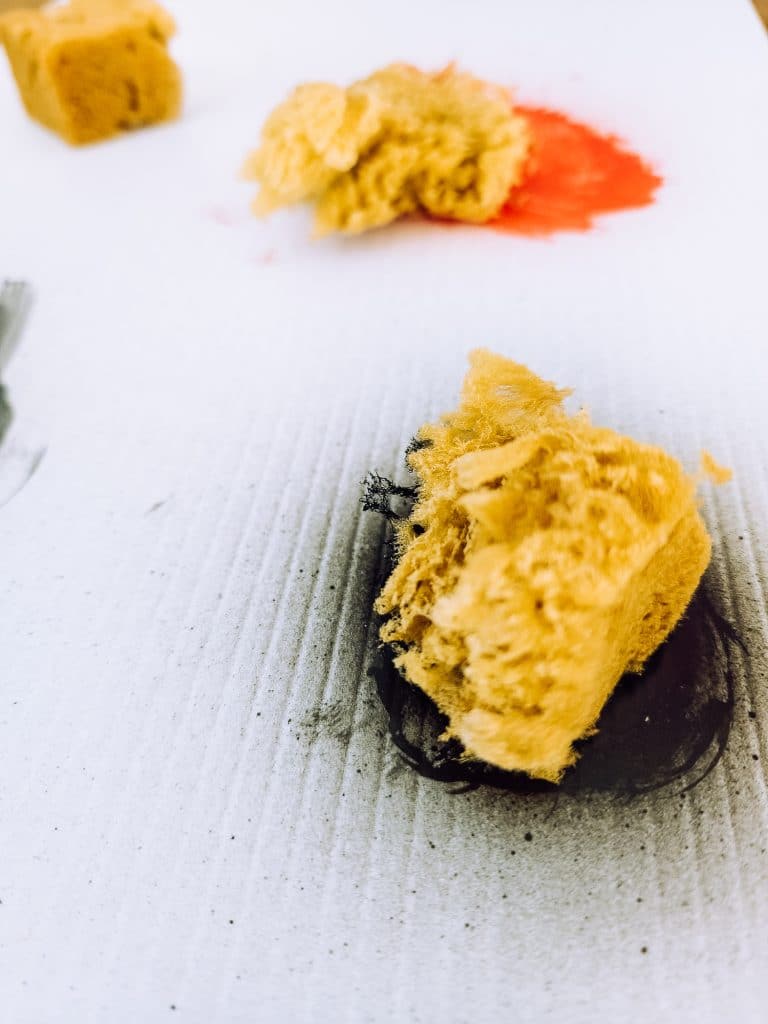
As per the above video – I wanted to use the sponge method – do you think I could find any though! For a couple of months I have been checking out hardware and craft stores – and in the end, ordered them online and waited for them to come in. Apparently, talking to a few people, the raw sponge has been a little hard to come by recently. Blame COVID!
Prep Work
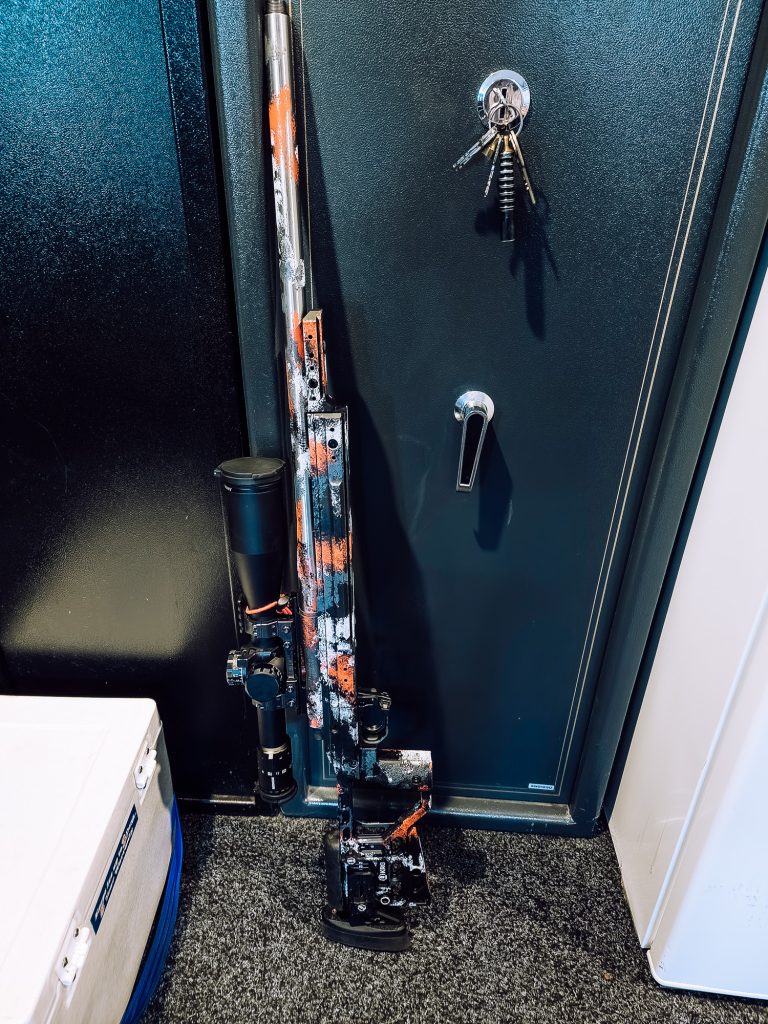
After pulling the scope off the rifle, I took the action out of the chassis and removed anything I didn’t want painted from the rifle – in my case – this was basically the buttstock and cheek riser pads. I gave the whole rig a clean down with some carb cleaner (any degreaser would work). As I skipped the base spray, I didn’t need to mask anything off. I was going to hand apply all the paint, so just avoided anywhere I didn’t want it to go.
I liked the idea of some of the paint over the steel barrel – rather than laying down a coat of black first. Again – up to you.
Painting
I grabbed some card to work as a bit of a pallet (actually target board) and sprayed the paint onto the board, before loading up the sponges and setting to work.
I would suggest starting with the lightest colour first, then working through to the darkest. You can always (as I did) add more paint on top of the lower coasts – so start sparingly, paint a bit, step back, observe, paint a bit more and so on. I think this really is a case of less is more – though it totally depends on the look you are after.
In the video Caylens finishes off the job with a matt overcoat. To be blunt, I also like the worn look – so don’t mind if the paint gets a rough time.
Results!
I am certainly happy with the results. The gun still smells a little of the paint solvents – but I am sure that will dissipate fairly quickly – and it’s not really a concern for a comp gun anyhow. The paint also feels a little tacky on the grip – so will be interesting to see if that disappears as it cures over a couple of days.
Regardless, the gun turned out how I hoped it would, so it was simply a case of reassembly everything and taking out to shoot.
I am sad to say the paint job didn’t improve the tripod shooting! 😉
I have seriously enjoyed watching Rusty and his many projects grow and grow. From the Podcast to the huge amount of video content to the PRS Competitions – Rusty has been working his arse off growing the Precision Shooting community in Australia.
We have spoken before, and popped up on each others shows once or twice – so I thought it would be a good idea to catch up to discuss how shooting in Australia (and NZ) has been growing over the last year.
I have been following Thomas’ work for a long, long time – in fact, I would have to credit a large part of my shooting philosophy and style to his work.
Thomas is the man behind THLR – a long-standing youtube channel providing phenomenal content for the long-range shooter and hunter.
In addition, Thomas has put together two feature-length courses that you can get via Vimeo – https://vimeo.com/ondemand/37429 – that I still regularly recommend to people.
In this chat, we talk about his history, his projects, shooting culture in Norway and much more.
Thomas really is a legend, and it was a true honour to talk to him.
Check out one of his latest videos as well – this is a condensed masterclass in shooting fundamentals!
The are many benefits to understanding and matching the twist rate of your barrel with the projectile weight you are using. Primarily, accuracy. This article is a high-level overview of the subject, and as such, a few concepts and terms are simplified. If you want a truly in-depth study of the subject – get Brian Litz’s series of books from Applied Ballistics. If you want functional information, read on.
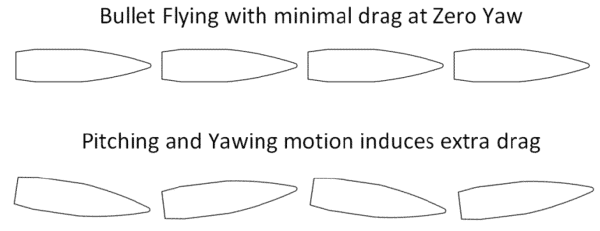
Too fast a twist rate and the projectile can potentially damage the projectile jacket as the excessive force separates the jacket from the core. As we get faster and faster twist rates – this is becoming more of an issue. I personally know a few guys with 1:7.5 Creedmoors that are having the Hornady Match projectiles spinning their jackets off on them mid-air.
Twist rates and bullet weight are often MISUNDERstood, but there are some simple and practical guidelines.
But first, a little background.
TWIST RATE
You can read an expanded article on twist rate over here – but in summary, a twist rate is the number of times your rifling (the groove in your firearm barrel) makes a full revolution over a set distance – this is generally expressed in inches – so a “1 in 10” makes one revolution of rifling every ten inches of barrel length.
BULLET WEIGHT
Bullet weight has increased as we are reached out further and further with our rifles.
A heavier projectile (more grains) will often come with a better (higher BC) – that is, the ability of the projectile to buck wind – they fly truer, for longer.
However, it’s not just as simple as putting the heaviest bullet you can down the barrel. More weight requires more powder to move – and speed is still a priority as a slow-moving bullet spends more time in the air, has more time to be affected by the wind, and in the understanding that everything drops at the same speed (thanks, gravity!) the faster it moves, the further it can reach with less ballistic drop.
MATCHING TWIST RATES AND BULLET WEIGHT
So, in very simple terms, the heavier the projectile (it is actually a function of bullet length and sectional density, but we are simplifying things here), the faster (lower number) twist rate you are likely to want to utilise.
I know, I know, just tell us already – what do I put in my rifle?
Well – here is a very basic chart that will set you off on the right foot. Like all things reloading, there are always exceptions.
Twist Rate
Projectile Weight
.224 / 5.56 (your .223 Ar)
1:16
Up to 55 grains, 4300 fps or more
1:15
Up to 55 grains, 4100 to 4300 fps
1:14
Up to 55 grains, less than 4100 fps
1:12
55-63 grains
1:9
63-70 grains
1:8
70 grains or more
6.5mm
1:9
Up to 130 grains
1:8
130 grains or more
.308
1:15
up to 150 grains
1:14
150 to 168 grains
1:12
168 to 170 grains
1:10
170 to 220 grains
1:8
220 grains or more
This is just a quick list to give you an idea.
But wait… There’s more!
Want to get the rest of the article? Then simply join up as a member and gain access to all the extra content here and over on The Bloke!
For around the cost of a cup of coffee per month (in Auckland, I do admit) you support the projects, get extra content and become an all-around good bloke.
Click the button, join up, then refresh this page here to get all the extra content!
In this article – seven simple steps you can take to start reducing your ES/SD right now!
I recently have had a good mate who has been destroying ELD-M’s with abondon.
It’s a 1:7.5 Twist, chambered for 6.5 PRC and he is getting projectiles disintegrating mid-flight. Too be fair – he is running right at the ragged edge of velocity/pressure/speed and the resulting twist these things are undergoing – but – it’s not super crazy what he is doing.
If you have a projectile that just seems to be going a little crazy – or – even missing rounds on target – it might be worth considering if we have managed to out twist some of the options on the market.
If you like what you are watching – we are live over on Facebook most Thursdays at 8:30pm – visit the Precision Shooter Facebook page and say hello!
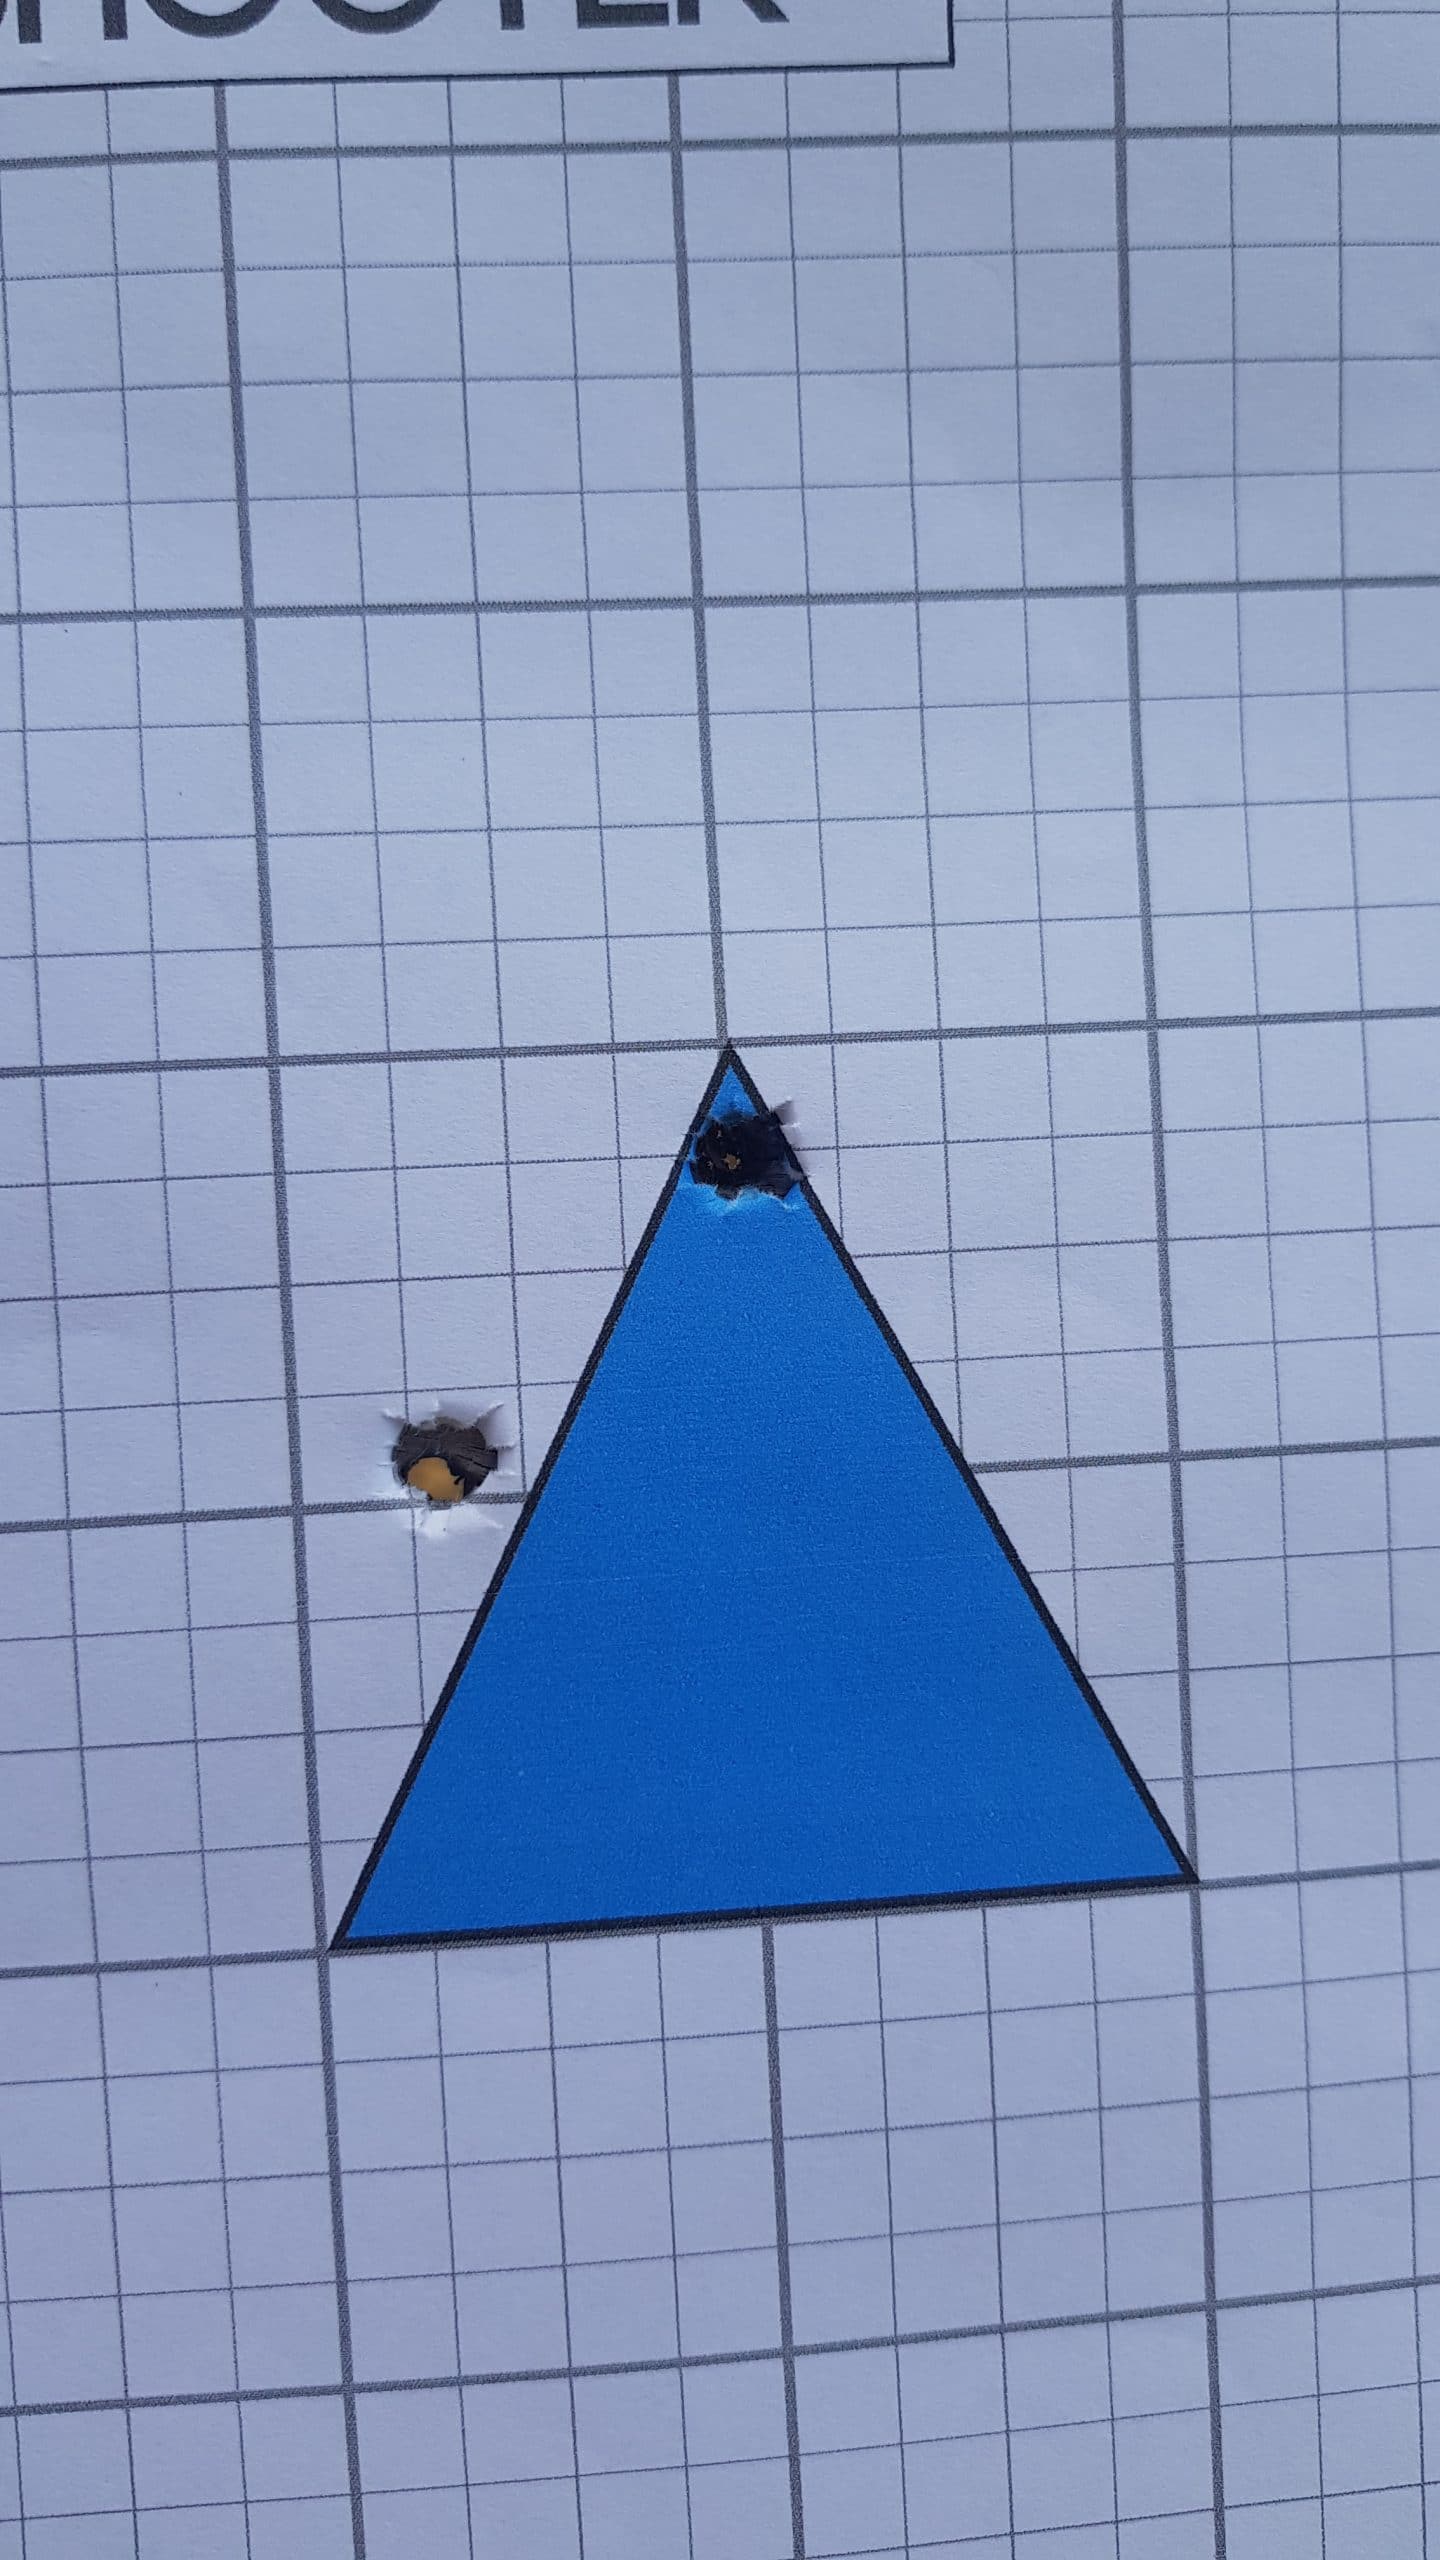
One of the most common issues I see with guns that are not firing – is simply that something has come loose. If your gun was shooting fine, then suddenly isn’t, the very first thing I would suggest is to reach forward and check the suppressor is still on snuggly.
Especially with bush guns, a little knock or bump can be enough to ‘un-nip’ the can on the end of the barrel – and now you have something that is moving around the end of the barrel – causing a random shift of point of impact. Even on the range, after a couple of shots, some barrel thread/suppressor thread combinations, where each thread is at the opposite end of the tolerance allowance – you can have it slightly unwind and cause issues.
Some suppressors are actually designed to prevent this – with the ports angled so they can ‘self-tightens’ a little with each shot. While we have heard of people putting thread tape on the threads, its not something I can reccomend.
Don’t get me wrong. Given the choice, I am always going to prefer a ballistic ‘superior’ match projectile to something not as slippery. But. There sometimes seems to be a little bit of a fixation on ‘requiring’ a match bullet to shoot to distance. Sometimes, it’s just basic stuff, done right.
Since we are experiencing a little bit of a projectile shortage here in NZ at the moment, I found myself looking at the shelves of the local gun store and not having much choice when it came to 6mm projectiles.
There wasn’t much choice.
I had a limited supply of 109 109 Grain Long-Range Hybrid Target Bergers at home, but I was really looking for some ‘plinking ammo’. So it basically became a case of choosing the cheapest projectiles on the shelf and seeing what I could do with them.
As it turned out, that was 100gr 6mm Interlocks.
I put together a quick load test using them, and, well, got an ‘acceptable’ result I guess. That’s five shots.
So, as I was headed the door, I quickly selected a load/node, made up 10 rounds of it and threw the gun and ammo in the bag, just in case I had a bit of spare time between rifle setups. I.e – plinking time!
As it turned out, I did. So while another shooter ran a few things over the chronograph, I lay down next to them in the dirt to quickly confirm zero – the gun is/was actually zeroed for a different projectile, powder and load, but I knew it wouldn’t be that far out.
Shot, used the reticle, adjusted, shot again. Done.
‘Come up a click’ you say. Sure. Whatever.
I turned around, opened up 4DOF, loaded up the interlock into the profile (BC mode, not actually the 4DOF system), put in the last recorded velocity, dialled up, thought to myself it didn’t seem enough (I should have stopped and checked here, I know better) – but, sent a round downrange, watched it hit the dirt a couple of meters in front of the target, adjusted, 2nd round hit. 3rd, 4th, 5th, 6th round hit as well. Done. Back to setting up rifles.
Apparently, if you accidently load 4600fps into a ballistic calculator, you get the wrong dope! Who knew!
So yes. This isn’t a case of humble bragging or some weird flex – it’s simply to point out that ‘standard’ projecticles, with a little bit of setup and basic fundamentals – are quite capable of hitting bits of steel a way out with minimal of fuss. Just make sure you double check your data solution before sending it!