Ah, chassis rigs. They have become commonplace now, but when I first ordered my XLR Element – they were still a bit of a mystery – mainly found in NZ on things like the Sako M10 and other military ‘level’ firearms.
Then, we started seeing more of them turning up on sporting firearms – for those of us following the early days of the PRS, it quickly became common – and the adjustability and customisation of them appealed. Sure – the ‘traditionalists’ turned their nose up at them, but, like many things, they simply were slow on the uptake. These are the same people who likely bought a 6.5 Creedmoor for their ‘girlfriend’ – but shoot it more than their magnums.
At the time, it was actually easier for me to order in a left-handed XLR via Norway than direct from the US, or through the non-existent local distributor.
A chassis has always been function-driven for me. I do definitely find them a little ‘cold’ compared to a traditional stock (Carbon one’s being an interesting middle ground) – but then – my competition rifle is a tool, not a safe queen – so function over form is no major issue.
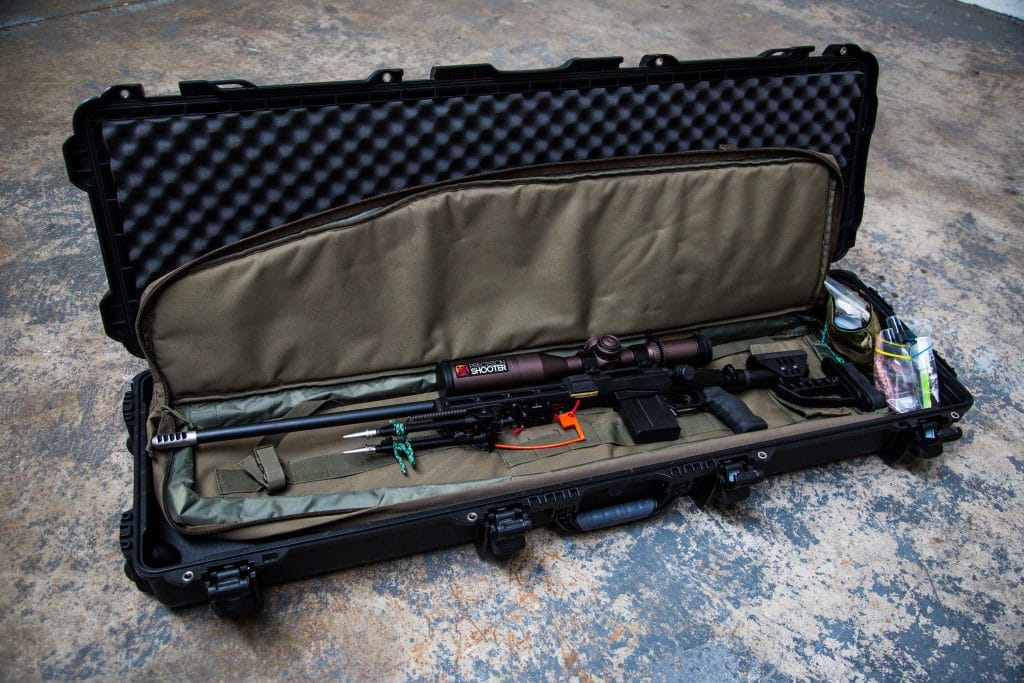
This was as I was putting together my first comp rifle – a stock rem700 in .308 – about as vanilla as you could get for the time, however, it dropped straight into the new chassis, and all things considered (and the factory barrel) it shot well.
Fast forward a few years, and that same action is now blueprinted and wears a Proof Research Axle of a barrel (Heavy Palma) in 6mm Creedmoor. I also shot very differently from how I first did.
Struggle bus
If you have read my article on getting square behind the rifle, you will know I like to have the butt of the rifle as medial as I can – however, for years, I have struggled because I physically struggled to bring the rifle close in enough that I could have my head up and down vertically – without the next twist I generally find myself, regardless of the rifle, getting into.
As it turns out, my last visit to the Optometrist was a little enlightening. I had a theory – and they confirmed it in a matter of seconds. My eyes are closer set than average. I figured this – because whenever I get behind binoculars – I always have to squeeze them as close together as they can to suit my eye distance. As a result, this also means that on most rifle stocks, I have to cant my neck/head over to get my eye behind the scope in the correct position unless I have the buttstock very medial. If I do that, then I can get my head straight up and down, but I also end up with something closer to a chin weld instead of a cheek weld.
Testing, testing…
With my job of setting up rifles for people – I get the opportunity to shot a lot of different rifles in a lot of different configurations.
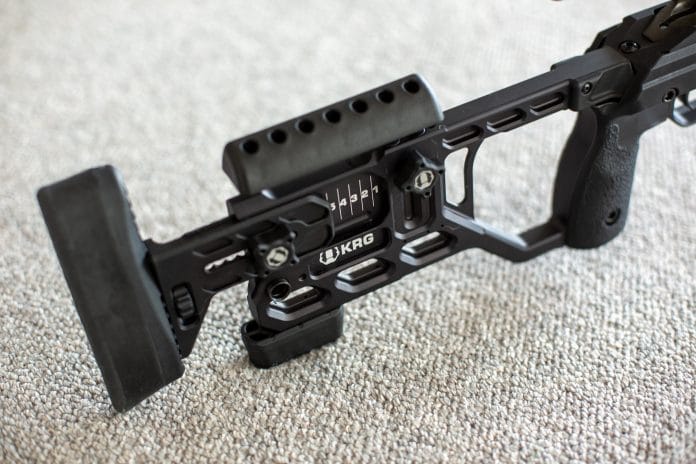
One day, a KRG Whiskey-3 turned up. This particular one had a Bergara Action and Barrel in it, and while it was a right-handed stock, I immediately took a shine to it.
I had shot the Bravo’s before – and I have shot the XLR, MDT, MPA, Cadex as well as a variety of factory chassis guns (like the TAC A1). The KRG stood out.
The only way I can describe it, and I am aware it’s a bit of a nonsense statement – is that it ‘felt’ very build for purpose and intentioned. I think, for me, things just worked as I wanted them to and the way that made sense to me. The only other rifle that has been like that has been the M10 – but of course – you can’t get that in a left-handed option, so I wasn’t going there.
Defining Intent
So. I have a bit of a hair-brained process going on at the moment.
I was very keen to build a rifle that I could use for both hunting and competition shooting – ideally, to me, that meant a switch barrel system – a lightweight carbon barrel in a hunting calibre and a heavy axle of a barrel for competition in a lighter, fruiter option.
I really liked the idea of using the same stock, ideally even the same scope. That way I could optimise myself on just one shooting platform, regardless of use. A lofty goal, but hey, why not try?
The also meant I didn’t necessarily want the heaviest option out there – while I knew it was going to end up heavier than a ‘mountain rifle’ – I had at least a consideration tucked away in the back of my head.
Which version?
So. I had my mind set on a Whiskey-3 – though – the slightly cheaper option, the X-Ray was also an option. I spend a lot of time trawling through videos online, trying to decipher which would be a better option for me.
The X-Ray was going to be a bit lighter, but, lost a little of the quick adjustment.
Now, it would be easy enough to say that you don’t need to adjust a stock after you have set it up, but – however, I have quite a few people shot my rifles, and, expect a couple of kids to be shooting them soon as well – and – the more these rigs become customisable, the more we head towards what some of the Olympic/Commonwealth Games styles shooters do – optimise their guns for each position they shoot.
I am picking that my optimal setup for prone will differ from supported standing – for example – and while I understand I won’t likely be changing setups between shots within a stage – I will seek to understand if I can shorten or lengthen my stock between stages if I know the majority of my shooting will be in a particular position.
I knew I wasn’t after a folding stock – I had it on my XLR – and didn’t really need/use it – I was happy to swap out the fixed option for a little weight saving, and, it’s one less moving part. I can always add that on later anyhow.
Finally, I wanted Arca Swiss. I intend to use a tripod with this gun, and, my bipod now also runs on the same setup – so no Picatinny or sling studs for me anymore.
In the end, I decided on the competition version of the Whiskey-3 – which, of course, isn’t available as a left-handed inlet. However. I spoke to the folks at Hardy Rifle – and they ended up offering to just pull two stocks to bits in order to build the configuration I was after. Fine by me!
It arrives!
Of course, it arrives in lockdown level 4 – where I can’t go and shoot it. However – I can certainly get it installed on the gun!
First – the add-ons
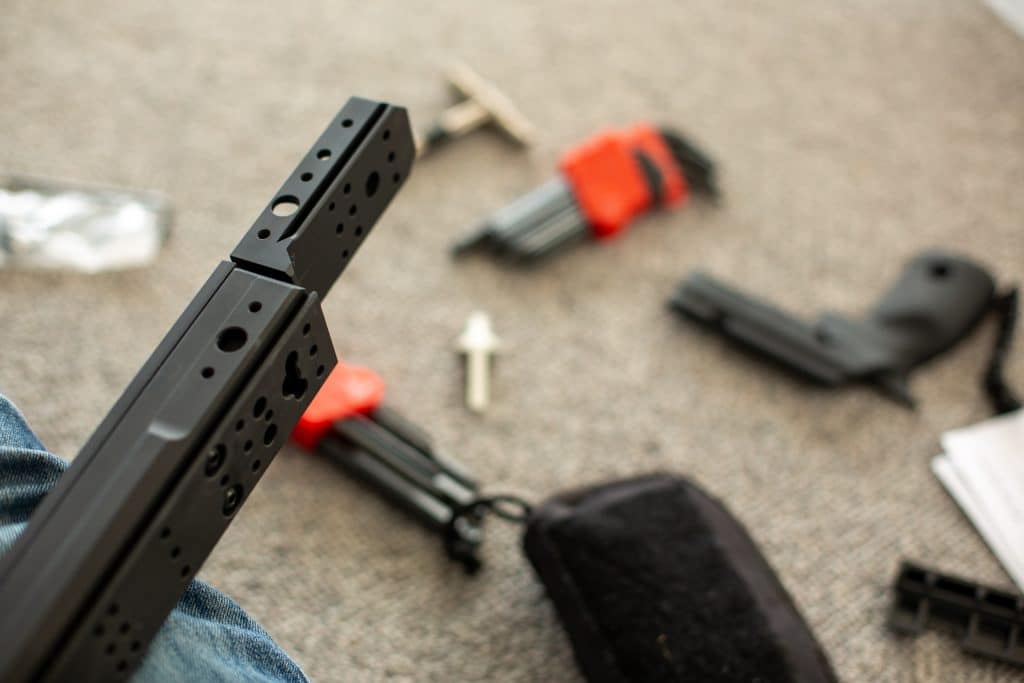
While you could probably put these on after mounting the action into the gun – I thought I would put the optional (though supplied with the competition chassis) Arca Swiss Spigot mount on first.
The spigot mounts into the front of the stock – this puts the mounting point out further, and, brings it closer to the barrel – thereby dropping the centre of gravity down further. You can get a variety of options – but – being I use Arca – that is the way I went. I see you can get an XL version as well – the puts the bipod waaaaaaay out in front – which I might try at some point. It will mean you can’t adjust the bipod from behind the rifle, and, will also mean you won’t get as much height out of the bipod – because of where the ‘pivot’ point would be. I have a monster of a bipod – so that really wouldn’t be an issue.
I potentially, with the idea of a multi-use firearm in mind – would remove this when I get either a swap barrel or second action with a carbon barrel.
Previously, I ran an Arca Rail from Area 419 bolted to the bottom of the XLR. This extended past the stock – and – unsurprisingly, flexed a bit. This KRG rig, however, is rock solid.
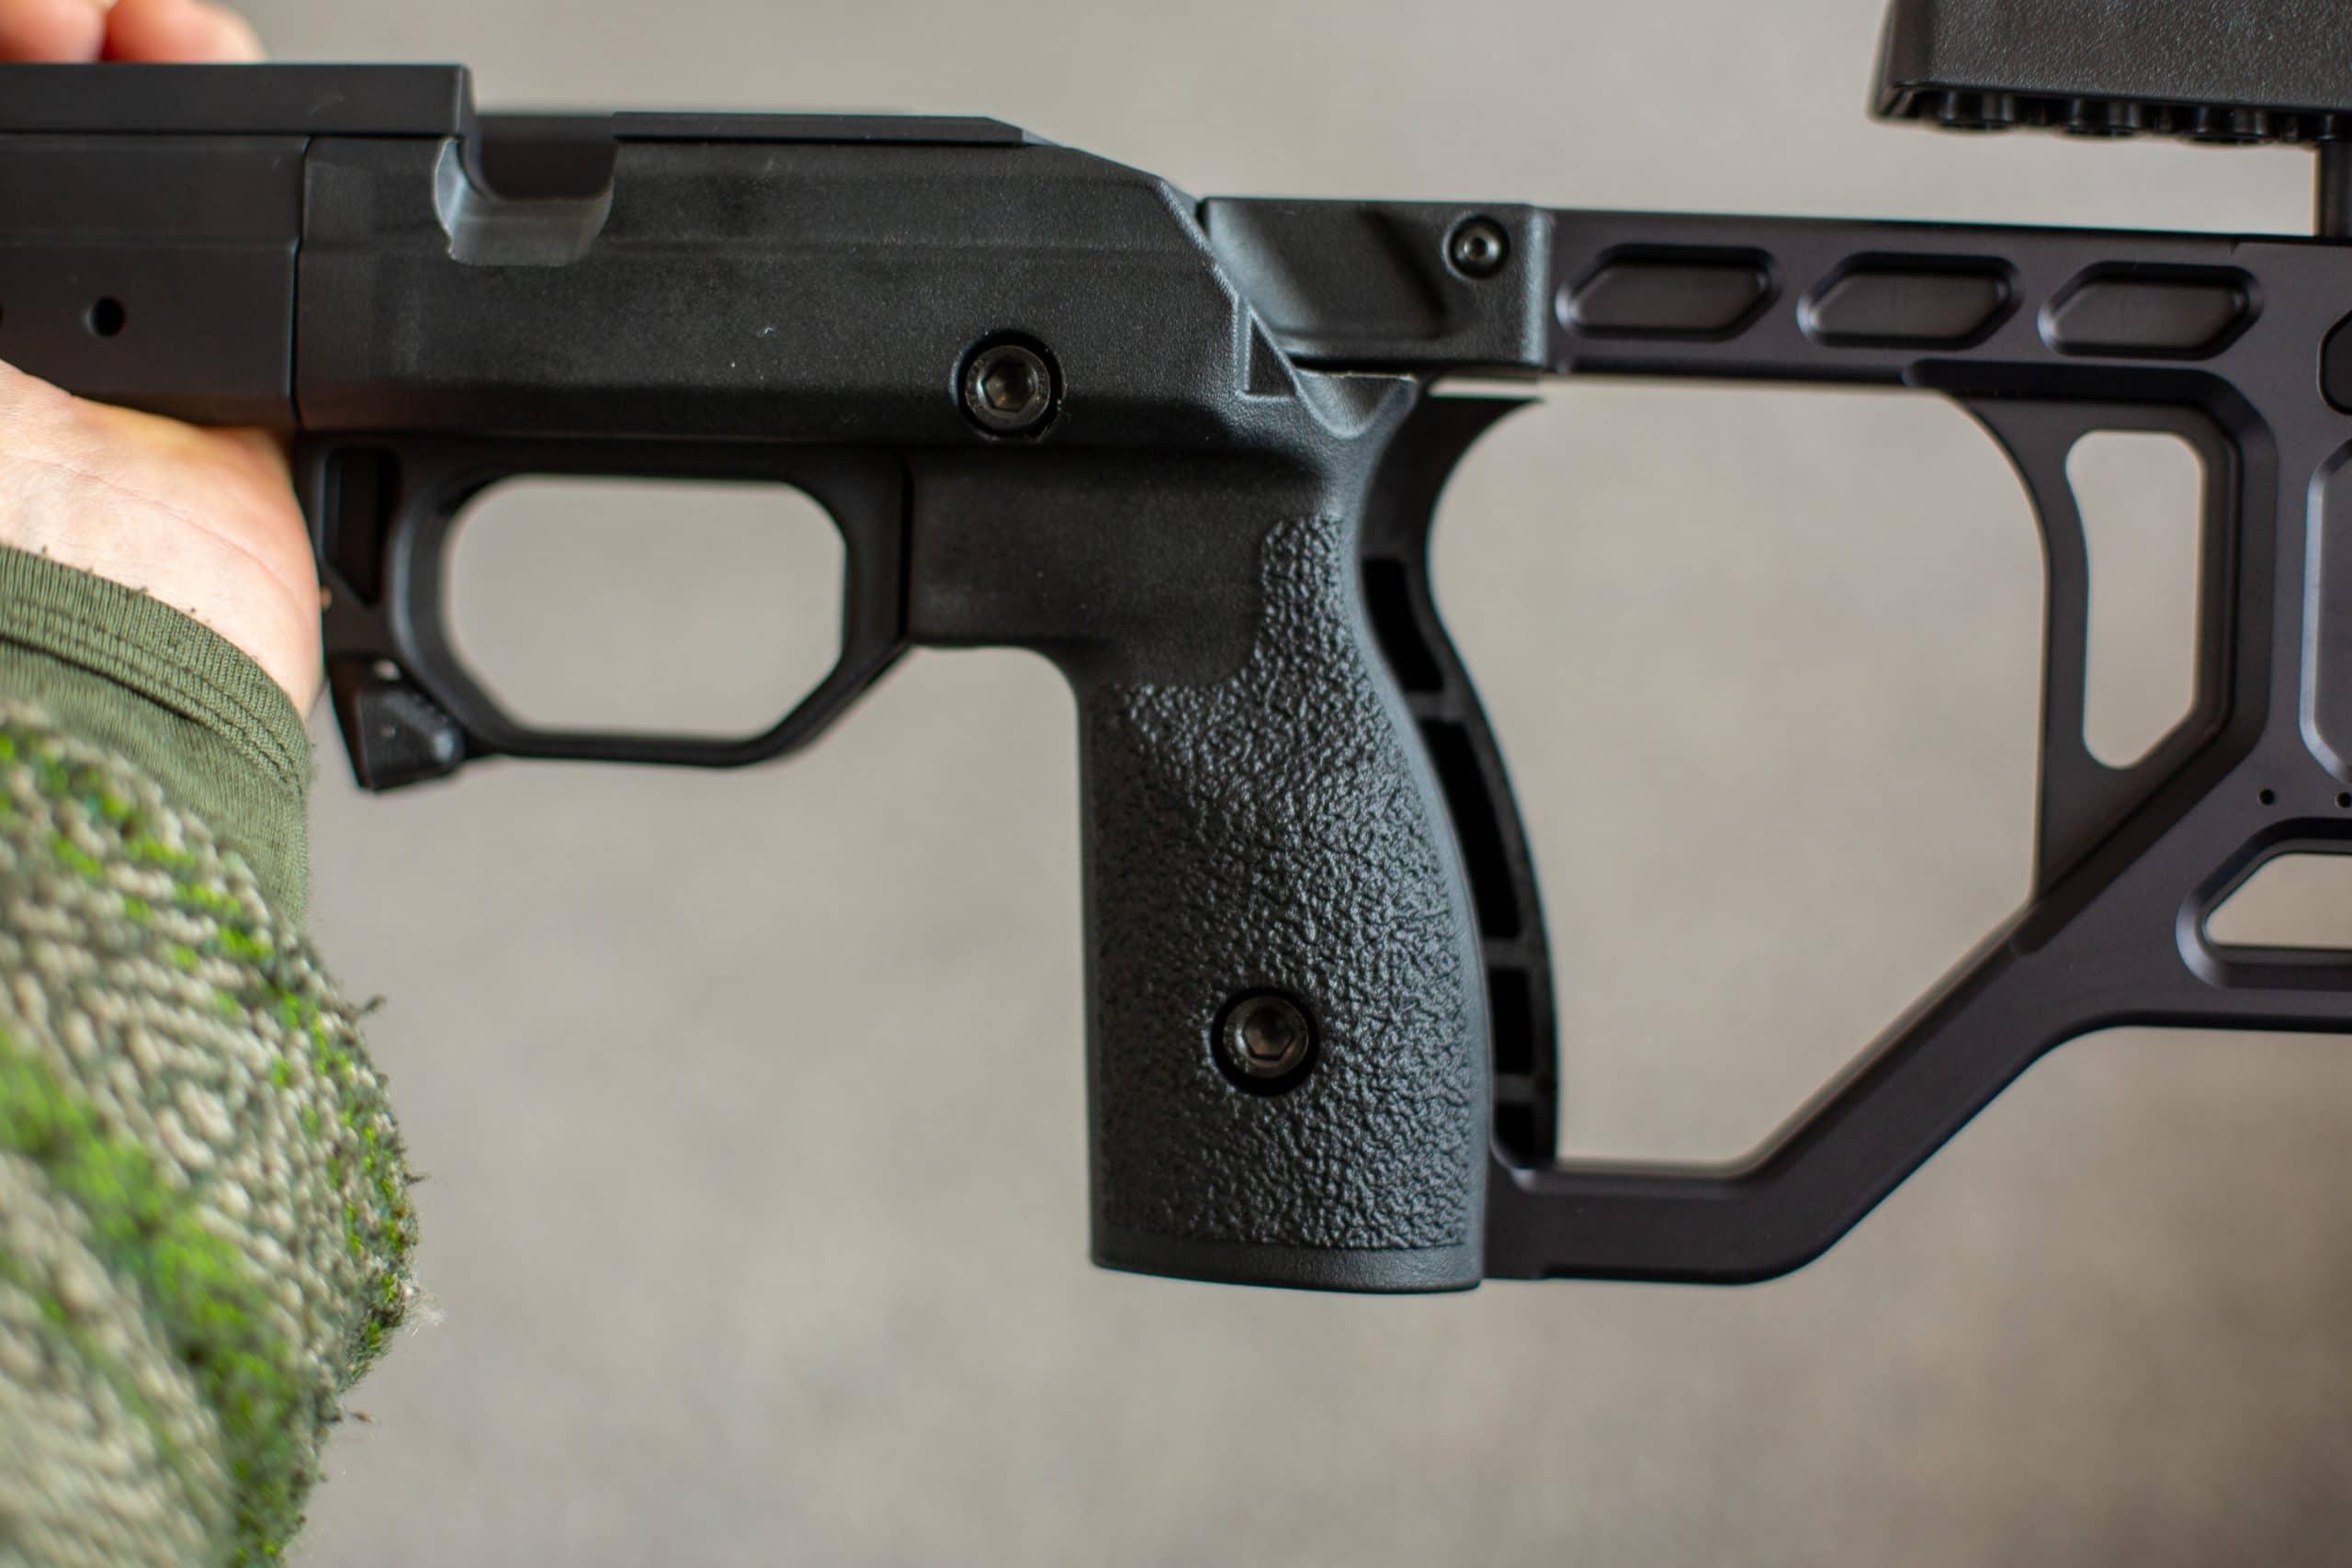
The chassis comes with two grip options, that are easily swapped out. I played with both but quickly decided on the smaller of the two. While I liked the extra swell in the palm, it also extended the grip backwards – and I have found that I like my hand as close to the trigger as possible to get a proper 90-degree trigger press (#90degressoftriggerpress). Both still have the thumb rest present – which I certainly like the feel of.
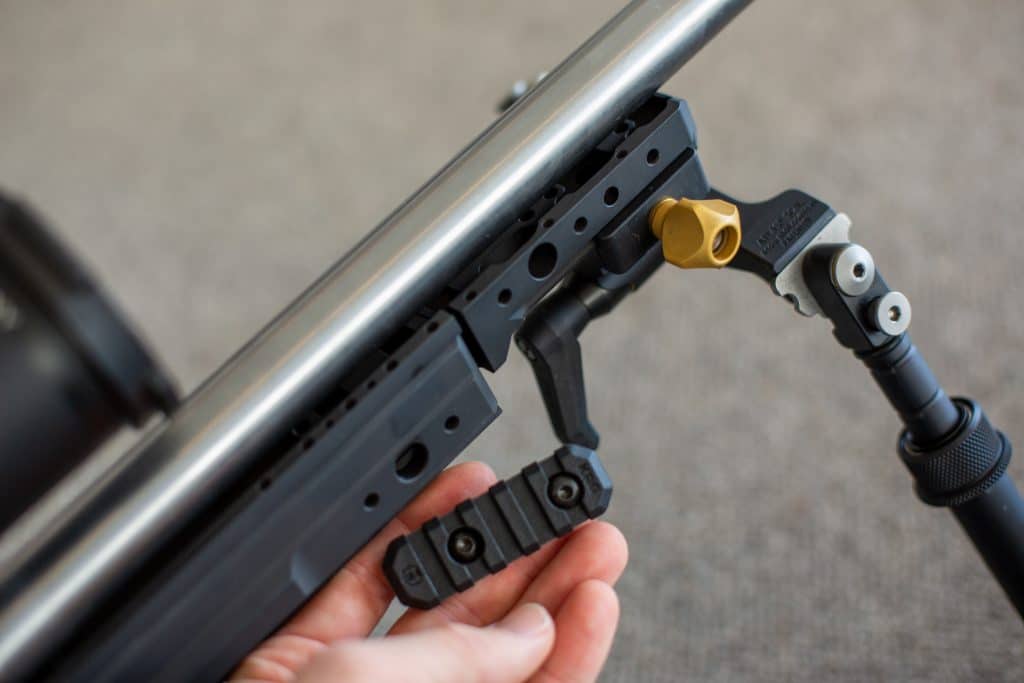
I also mounted the Picatinny rail to the one side of the stock – out the front – this will be used if I ever want to bolt a GoPro to the side of the gun to film selfies while I shoot (or a Mantis for training). This won’t fit on the spigot – it sits too wide.
I was surprised to note there is no QD mount on the front of the stock, without grabbing an extra mounting plate. No major, but would have been something I thought could have been included. I don’t use a sling a lot – but do wound the mount there for when I do. Will add it on soon.
Mounting
Putting the action into the chassis is a fairly straightforward procedure. Two action screws and you are done. KRG recommends 65 in-lb – but – also suggest trying other torque settings. The Fix-It Stick Set I have has 55 and 62 – so I have set it to 55 for the moment – and will test out 62 when I am on the range next.
Well. It certainly looks like the business! Now to set it up for me.
Set Up
I first set up the length of pull – using the time tested method of ‘crook of arm to trigger’ position – I think it will likely end up a stop closer in the end.
I also lifted the buttpad up high and canted it slightly to the left. This allows me to get it even more medial without the stock starting to press into my neck.
Getting square behind the rifle – and worth noting at this point – ignore where your scope might already be mounted – I found the check rest was way forward. Easy enough to adjust on this stock. I found all the way back and nearly right down was optimal for me.
Ultimately – until I have fired the gun in a variety of positions, I won’t be able to settle on the best position – but – with the dry fire I have been doing with it – it feels pretty dang good!
Options options options…
There are quite a few options that I can still have a play around with on the gun. A couple I am fairly sure I want to do – a couple would be nice to have a play with first.
Adding Weight
There are quite a few options for adding more weight to the chassis. However, for me, it already feels heavy enough – and more importantly (I believe) the balance (without the bipod on) sits just in front of the magazine well. Which is where I want it. While I like the idea of a sloped bag rider – a heavy unit would mean the gun would be back weighted, so then I would need to add weight up front again. It is heavy enough already.
While I am talking about the bag rider – I like this one a lot more than the skeletonised option on the XLR. I like to grab the rear bag and the stock – ‘pinching’ them together. There is nothing to grab on the XLR. This one – I can hook the webbing of my hand up into the stock. Nice!
Cheekpiece Options
I am keen to check out the over-moulded cheekpiece – but more so – I want to grab one of the adjustable cheekpiece mounts – which allows some (meaning left or right) adjustment on where the cheekpiece sits. This could move the cheekpiece over a bit and allow me to get ‘down’ a bit more with my head – back to a cheek weld more than the jaw. Worth a play.
Two Rounder
The two-round quiver seems like a gimmie at this point. I have the velcro SAP options – but a moulded, solid mount seems like a good idea. I do use mine often.
All in all…
I like it! The new stock has brought back that sense of purpose I remember from shooting other KRG stocks – and the dryfire in prone and off the tripod is feeling solid.
Particularly the extra adjustment on the buttstock has allowed me to really dial in some settings that make me just that bit more comfortable behind the rifle.
I am looking forward to shooting it!








You must be logged in to post a comment.